Vera Control integration with Amazon Alexa
- Homekit ᴬᴱ Admin

- Jul 10, 2019
- 2 min read
Vera works with Amazon Echo Show, Echo, and Echo Dot. Just ask Alexa to control your light bulbs, on/off switches, dimmer switches, smart plugs, thermostats, and Scenes configured with Vera. Also ask her the status of the supported devices and to answer questions.

Here is How to connect Amazon Alexa with Vera
Note: For security reasons, Alexa cannot unlock locks and will only support Scenes with lighting- switches and dimmers, and thermostat devices at this time.
If you don’t have an Amazon account already, download the Alexa app on your mobile device from the app store.
First of All, ensure your Vera controller has the latest firmware. To Upgrade, go to the Dashboard from home.getvera.com, Dashboard > Settings > Firmware
Get started by following the steps to pair your Alexa with your Vera Controller.
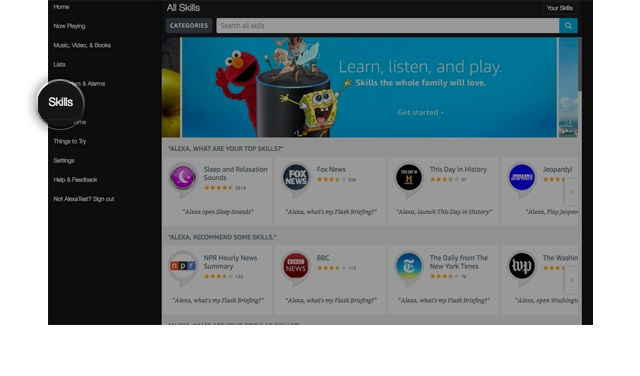
1. Login at http://alexa.amazon.com and click the Skills section.

2. Search for “Vera Control” (the name of the Skill) and access the Vera skill by tapping on it.
3. Click the “Enable” button.
4. At this point you should be redirected. Log in with your Vera credentials.
5. Once you login, a list of the devices and scenes from the assigned Vera unit should be displayed.
Note:
Device types that have security or safety considerations are prohibited at this time. Alexa will not discover or execute commands on them. When customizing device names, do not use special characters as Alexa will not recognize these special characters.
The following devices are not allowed:
Door Locks
Garage Doors
Security Systems
Security Sensors
Cooking Appliances
Cameras
The prohibited devices also cannot be used in scenes. If a scene contains a prohibited device, it will not work with Alexa.
The Vera Smart Home Skill API currently supports lights, switches, smart plugs and thermostats, including turning devices on and off, dimming lights, and thermostat controls.
Alexa can control devices such as Turn off/on, dim/brighten lights and change the thermostat temperature. It can also provide the status of the supported devices and answer queries.
6. Select all the devices and scenes that will be controlled with Alexa, give them custom names if needed and click on Finish.
The installation is now processing...
If installation fails, it might be because you have an older version of the firmware installed. If that’s the case, you’ll receive the error message, “no controller found”. If you receive this error message, please manually update the plug-in to the latest version.
7. After the plugin is installed and the accounts are linked, the following message will appear: "Alexa has been successfully linked with Vera Control”.
8. To discover devices, return to the Alexa page and a pop-up should appear with the message “Smart Home devices must be discovered before they can be used with Alexa.” Simply click on “Discover Devices” to discover your devices from your Vera unit.
9. Once you click on Discover Devices, a pop-up will appear with the message “Alexa is looking for devices.”
10. After the message disappears, you’ll be able to see in the Smart Home tab, all the discovered devices.
Congratulations! Your Vera system is now successfully linked to your Amazon Alexa device.


Comments